****Taken from here…. http://www.hdskate.com/skateboarding-articles/photography/shot-composition-basics/ ****
I’ll start by going over some tips for skateboarding photography, then I’ll cover general guidelines for your photographs and videos. These guidelines are good for any type of subject, not just skateboarding. Also, they are guidelines, not rules. To create certain desired effects, you may want to intentionally go against some of the ideas outlined here.
Do Not Dismember Your Subject
Your subject is the skateboarder. If you cut off parts of the skateboarder’s body it makes for a less cohesive photo. Nobody wants to see a picture of a random pair of legs riding a skateboard. The skater’s whole body should be visible.
Make The Run Up Visible
The run up is your Point A. The viewer should be able to tell where your subject is coming from. If you have a shot of the skater up several feet in the air but didn’t show the kicker that he launched off, it’s very misleading.
Show Something Taking Place
Something is the skateboarder doing a trick. This is your focal point. When someone sees your shot, this should be the first place they look.
Make The Landing Visible
Point B is the landing area. Excluding the area where the skater is going to land is one of the easiest ways to ruin a skateboarding photo.
Now that you have the general idea in mind you need to choose the details. Remember that the skateboarder is the focal point. The star of the show.
Simplicity
If there are a lot of things in the picture it’s harder to draw attention to the subject. When you’re getting ready to shoot, become conscious of what is in the frame and whether or not it’s going to distract the viewer from focusing on the subject. Watch for other people, signs, trees, colorful objects, your camera bag (really bad), poles, cars, and anything else that could steal attention away. You don’t always have to remove all of these things from the photo, but you should make sure that they are secondary.
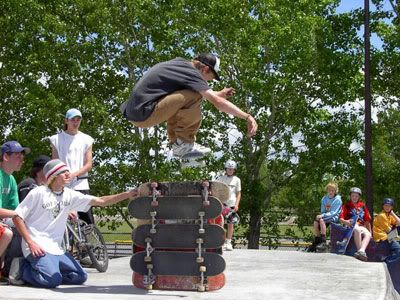
Here’s an example of a “busy” picture. The skateboarder is hard to look at with all of the leaves behind him, and there is no depth to the shot.
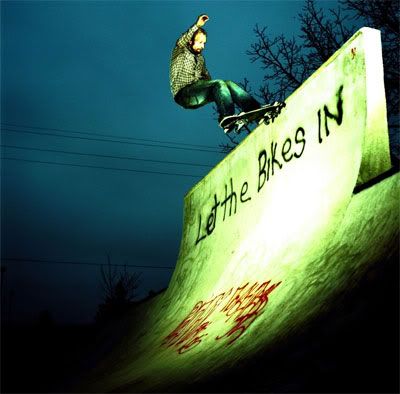
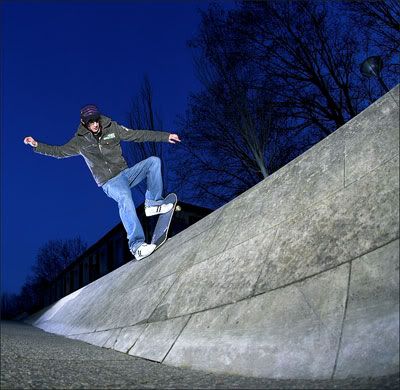
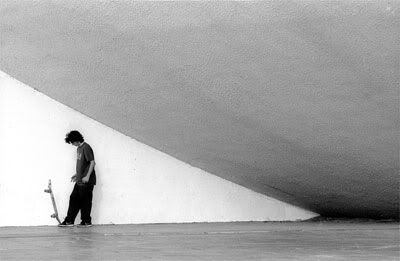
This shot is very simple. You can see the skateboarder and the obstacle. That’s all you really need.
Point Of View
Standing and shooting a picture is just one point of view, and probably the least interesting one. The angle and point of view you choose will have a huge impact on your photo. Standing straight up and shooting the skateboarder directly towards you will result in a flat looking picture (unless you manipulate the depth of field), where as getting down low and moving to the side may bring the photo to life. An overhead view might offer the best perspective. Try a bunch of different view points and angles before you shoot and see which one looks best.
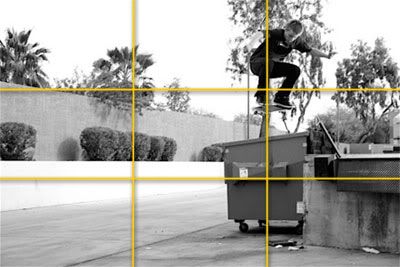
Rule Of Thirds
Imagine the field of view as being divided into thirds both horizontally and vertically. Frame the shot so that the main subject is located at one of the points of intersection. People tend to find picture more aesthetically pleasing when subjects are more towards one side. When picking up a camera for the first time, most people tend to try and center the subject. When you start to pay attention you’ll realize this isn’t always the best choice.
Leadroom
The space in front of a moving subject is called leadroom. It helps to suggest which direction that the subject is moving in. Without proper leadroom the viewer will feel as though the shot is cramped or awkward. For proper leadroom you want to have more space in front of the subject than behind them.
Noseroom
Noseroom is very similar to leadroom. It’s more for close ups of a person’s head. It’s particularly important when the person is talking to someone who is off screen. Improper use of noseroom leads to the shot feeling cramped and unbalanced.
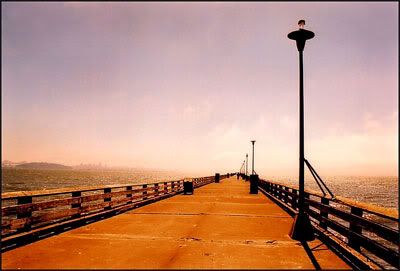
Leading Lines
Leading lines are naturally occurring lines that direct the viewers eye and draw attention to certain parts of the shot. If your
shot has leading lines you want them to be drawing attention towards the skater and the trick, not away from them.
Diagonals
Diagonal elements help to add a more dynamic feeling to photos.
Mergers
Mergers occur when a foreground object aligns with a more distant object in a way that causes them to seemingly blend together. Mergers are bad.
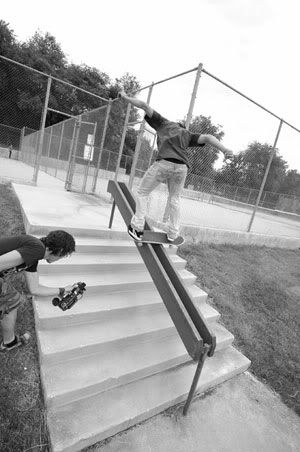
The fence post directly behind the skateboarder is distracting in this shot. Actually, the whole fence is, but that post is the main culprit. This could have been avoided by choosing a different angle. A low angle from the bottom of the stairs might have done the trick. If the fence was still a problem, shooting down from the top of the stairs might have been a better choice.
Balance
Asymmetrical compositions often look better than symmetrical ones. Making one side (top half or bottom half too) “heavier” can create some nice effects.
Natural Frames
Objects in the area may be used to create natural frames around your subject. This will draw attention to the framed area.
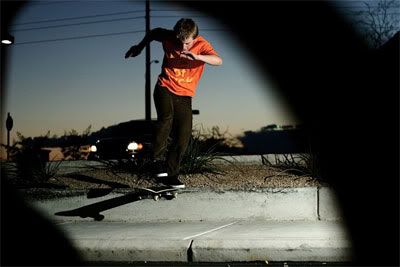
Contrast
Contrast is a great way to emphasize certain points in a picture. Try a dark subject with a light background, or a light subject with a dark background. This can also be done with colors. A colorful subject amidst an otherwise dull background, for example.
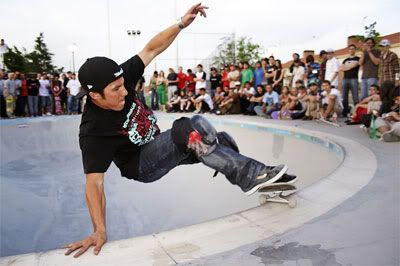
Depth Of Field
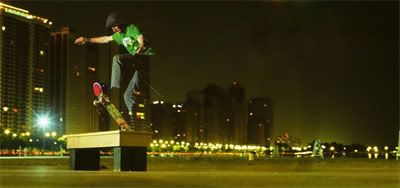
You can manipulate depth of field to help isolate your subject. Softening the focus of elements in the photo allows you to keep background or foreground details in the shot while avoiding a busy look. In this example the crowd in the background is blurred, while the focus on Christian is sharp (though somewhat hard to distinguish in this scaled down version).
Now that you’ve read over some of principles of composition, take a look at pictures you’ve already taken. You might notice that you’ve already been following a few of the guidelines. You’ll probably also notice how some of your shots could be improved. If that’s the case, great! That means you’ve learned something. Next time you’re out shooting you’ll be better equipped to take a sick photo. Also remember that you’ll come across instances where your shot will look better by not following these guidelines. If it looks good, don’t be scared to take the shot.